Automatic X axis feed to the DM 130 V mini milling machine.

Picture on the left bolted the spindle to the left hand side of the X axis table it will work but doing this will loose me travel on one side. It seems the nut is fitted of center and works best if the spindle is fitted to to the right hand side of the table.
Picture on the right spindle back in the original place, with a new end plate to be fitted in the left hand s1de in the vice. Ready to be machined to the correct dimensions.


Making of the new end plate to fit the automatic drive drive train to the spindle.


Pictures on the top machining the end plate and temporary fitted to the table.
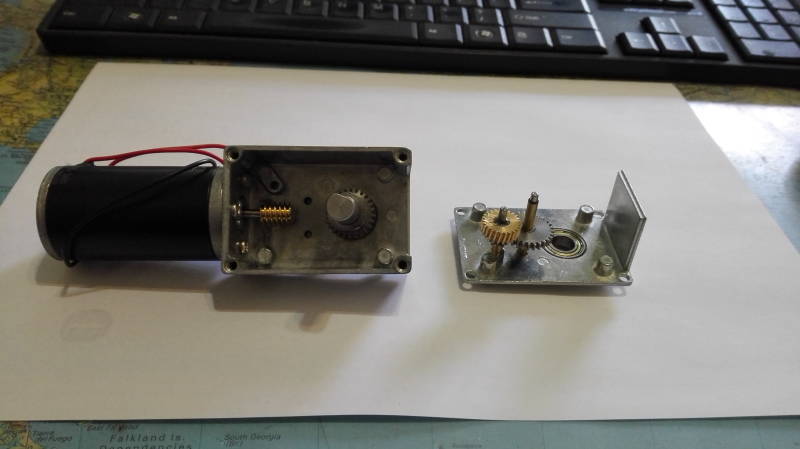


Picture on the left the geared motor supplied by Banggood opened up for inspection and the gears and shafts all look a bid flimsy I hoop it will stand up to the job I have in mind for it moving the X axis if and when required ,before boxing it up I added some grease as there was a minimal amount added by the factory. Testing the geared motor with an 12 V DC supply , it gave a very good torque I could not stall the motor by hand..
Center picture. The end plate that will be fitted to the one end of the table completed . Done the final machining bored out the one side to take the spindle support bearing . Also made a mounting plate for the geared motor that will drive the spindle. Final machining and drilling of mounting holes still to be completed.
Picture on the right the power supply ,mounting box, double pole double trow switch and the motor control.


Picture on the left a piece of hollow bar was bought to manufacture the housing.
Picture in the center machining the housing. Picture on the right housing ID and OD machined to the right size, capable of taking both end plates


Left and center pictures showing the end plates machined and temporary fitted.
Picture on the right holes for the holding down bolts drilled and tapped in the end plate, and fitted to the housing . Also slot machined in the housing for the clutch handle to operate in freely.


Picture on the left trimmed of excess material on the housing to bring it more or less in line with the mounting plate .
Center picture motor mounting plate all the mounting holes drilled to take the motor and to attache end plate to the housing.
Picture on far right all holes drilled and tapped.


Picture on the left all bolted to the table and measurements taken for the spindle extension the next step.
Center picture table spindle removed and and center hole drilled and reamed to take an shaft extension for the automatic table feed drive. I was very impressed to find that the spindle has two proper trust ball bearings.
Right hand picture machining the extension shaft that will fit the table spindle.


Picture on the left extension shaft fitted , showing the 17 mm socket that is able to slide easily over the square on the end of the shaft to engage the drive motor.
Center picture all assembled with every thing fitting very snug and the extension shaft being the correct length to engage the socket to the drive motor.
Picture on the right all components fitted and tested , finding that the motor is under powered and will not move the table even with the feed set to 100 % whit out assistance. The motor has been removed and is fitted to the Emco SL
The motor removed from The Emco SL , an adapter plate will be made and the Takanava 555 geared motor will be tested on the mini mill.

New adapter plate made with the hole of center to adapt for the installation of the Takanava 555 geared motor. This set up seems to have enough power to drive the X axis of the mini mill and will be tested in the coming weeks. What I am planning to do is make a cover plate over this installation. This will make it look more presentable and professional.


Picture on the left the final touch a sheet metal cover over the mechanism to keep most of the chips off.
Picture on the right the X axis automatic feed in full operation and working very well, with the speed of the table feed very easily controllable with the variable speed power supply. an other project completed until something better comes along.


Picture on the left a small improvement made to the cover over the Taknava 555 motor. Extending it all the way over the motor . In this way keeping the chips , from the permanent magnets of the motor. The system has been tested and works fine, the manufacturer could have included this option for a couple of dollars more.

Create Your Own Website With JouwWeb